It’s no secret that audio quality is critical to the success of a podcast. Your listeners want a smooth and pleasant listening experience. This means your voice needs to be rich and clear and there shouldn’t be any distracting sounds.
You can fix a lot of things during editing, but that takes time and energy (and maybe money, depending on how you work) that you should spend creating better content, finding guests, and promoting your podcast. The easiest and most productive way to create clean audio is to adopt some new podcast mic techniques.
Podcast Mic Techniques To Improve Your Audio
With the right mic techniques and bit of practice, you should be able to create recordings that requires minimal editing. These mic techniques will improve your podcast audio.
1. Choose the right microphone
You don’t need a $5,000 microphone to create clear and pleasing audio files. In fact, you can record professional podcast episodes with a mic that’s less than $100. But what kind of mic should you choose?
A condenser microphone is best for delicate vocals and high frequencies. The audio is crystal clear, but that also means it picks up imperfections and environmental sounds, like your breathing or whenever you swallow. This kind of microphone is best for someone who has a lot of experience podcasting and controlling their voice, or someone who doesn’t mind spending a lot of time editing.
A dynamic microphone is great for capturing strong vocals and loud sound. They don’t have the precision clarity of a condenser mic, but they’re more than suitable for podcasting. The best part is that they’re considerably cheaper than condenser mics.
We typically recommend dynamic mics for new podcasters, but you may prefer the tone of a condenser mic. If you can, play around with both to decide which is right for your show. But if you don’t have a preference, pick up a dynamic mic.
Check out our microphone recommendations for options that fit any budget.
2. Find the right distance
Your proximity to the mic will affect the audio quality. You can disrupt your audio if your microphone is too close to your mouth or too far away. Generally speaking, it’s best to position your face about two inches away from the mic.

You don’t need a ruler, however. Hold your hand in front of your face with your fingers pointed up and spread naturally. Place your thumb at your nose and your pinkie finger on the mic. That’s about the right distance. Any closer and the mic will pick up your mouth sounds. Any farther and the mic will pick up room sounds.
That said, don’t be afraid to experiment with styles and positions until you find the one that’s comfortable and makes your voice sound the best. You may like the sound a little closer or farther away than most people.
3. Maintain a constant distance
Once you find a distance from the mic that’s comfortable, you’ll want to maintain that position throughout your recording. If you drift away from your mic (maybe you lean back in your chair or turn your head to look at something), the mic will pick up less of your voice. If you lean closer, the mic will pick up more of your voice. In either case, you’ll have to do some careful editing to fix it or settle with an amateur recording.
4. Keep your hands off the mic
We could talk for hours about the proper ways and improper ways to hold a microphone, but the best piece of advice we can give you is to not hold it at all. If the mic is properly positioned before you start recording, there’s no reason to hold it or move it.
Of course this means you need a microphone with a stand. We like the Audio-Technica ATR2100. It also helps to have a boom mount to keep your mic firmly in place and off of your usable desk space. We like the Neewer Boom Mount.
5. Dampen the room sound
Sound waves from your voice can bounce off any surface in the room and come back to your microphone. This creates a slight echo effect for your listeners. If the effect is strong, the audio can be quite distracting for your listeners.
Dampen these sound reflections by recording in a room with carpeted floors and cloth furniture. These surfaces soak up the soak rather than bounce it back. If you have a large hard surface like a wall or table, cover it with a blanket while you record, especially if it’s near your mic. Consider hanging some acoustic tiles, like Foamily Acoustic Panels Studio Foam Wedges.
6. Use separate mics for each person
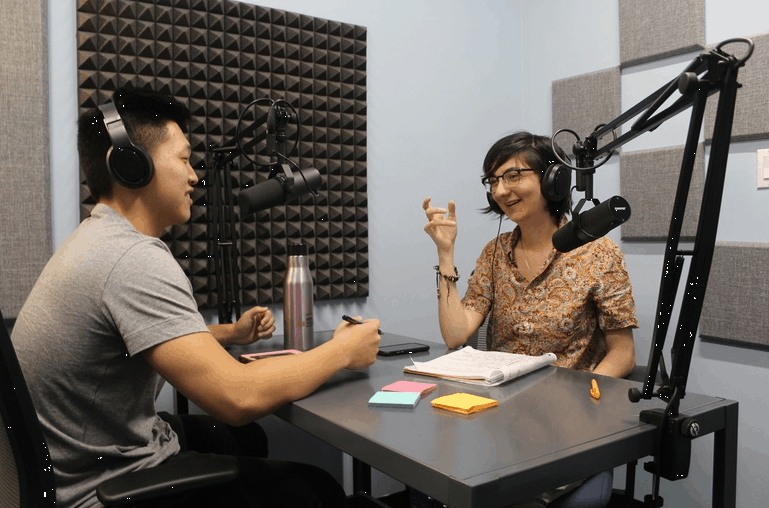
If you record your podcast with a co-host or a guest, it’s best not to use the same microphone. There’s no good way to position a microphone in a room for everyone to use effectively. Record each participant on their own audio track through a separate microphone. This is called multitrack recording or a “double ender.”
Notice how these two podcasters use different mics even though they’re close enough to share one.
7. Stand on your feet
Many podcasters, broadcasters, and voice artists like to stand while they work. This creates better air control in your torso and throat and tends to keep you engaged with your content, your co-host, and your guests.
Standing is also an easy way to minimize sound reflections off your desk. Use a music stand or tabletop podium if you need something to hold your script, but place an acoustic tile or carpet sample behind your paper to eliminate reflections. Use a boom mount to raise the mic high so it’s close to your mouth.
8. Use a pop filter
Some consonant combinations in your speech can create bursts of air that reach your microphone. This happens when you use words with F sounds, K sounds, T sounds, etc. These are called plosives. If you aren’t comfortable around a microphone yet, your plosives will be impossible to ignore on the recording.
The easiest way to eliminate plosives is to install a POP filter on to your microphone. This device uses a thin layer of nylon or perforated metal to disperse the gust of air that comes from your mouth without inhibiting sound. It clips neatly to the front of your microphone. The result is smoother sound with harsh consonants.
POP filters are cheap and can dramatically improve your audio quality. The PEMOTech Microphone POP Filter is only $10.
9. Angle your mic
If you don’t have a POP filter to dampen plosives, you can reduce their impact by angling your microphone about 45 degrees away from your face. This sends the burst of air from a plosive past the microphone, rather than directly into it. Ideally, though, you should really pick up a POP filter. It takes a long time to master the right microphone technique to stop your plosives.
10. Always wear headphones
We never hear ourselves the way other people hear us because our ears are positioned away from our mouths. Headphones, however, effectively put your ears in front of your mouth so you hear exactly what other people hear.
Headphones are important because they give you more control over the volume and tone of your voice. Your brain will automatically tweak the way you speak based on what you hear so you end up sending the best audio into the microphone. The practice become second nature in a very short time.
This is especially important if you bring guests into your recording space. They won’t have your experience in front of a microphone, so they’ll need that instant feedback to know if they sound good. Headphones on your guest will prevent you from repeatedly asking them to raise or lower their voice.
Furthermore, headphones will help you hear exactly what the microphone hears. You’ll be able to identify ambient sounds that are making their way onto the recording so you can eliminate them from the room, rather than spending time cleaning it up in editing.
11. Limit ambient sounds
Ideally, your voice should be the only sound your microphone picks up. Anything else will distract your listeners and make you podcast episode sound unprofessional.
Consider all of the other sounds in your recording environment. There are probably numerous sounds that you’ve grown accustomed to. Here are some examples:
- Your computer’s fan
- Your keyboard and mouse clicks
- Cell phone notifications
- Pet noises
- Appliance sounds
- Running water in pipes
- Wind against your windows
- Rolling wheels under your chair
- Cars or people outside
Best way to hear what your microphone hears is to plug in a set of headphones and listen for a few moments without speaking to hear ambient sounds. Then take steps to reduce or eliminate them as best you can.
Master These Podcast Mic Techniques
There you go! Once you master those techniques, you’ll have crystal clear audio for your listeners to enjoy without distractions or interruptions. Do you have any podcast mic techniques to recommend? Let us know in the comments.


“It’s best to position your face about two inches from the mic” – do you mean ten inches? That’s what your photo shows with the spread-hand spacing method.
I have found out that a condenser mic is better for me than a,dynamic mic Everyones voice is different so that is why they have different nic